Painting: Lesson 2
Watercolor
What You Will Learn |
|
Supplies |
|
Watercolor painting requires patience. Waiting for the layers to dry makes for a better painting.
This is a simple exercise to get you started with watercolors.
A wash is watercolor diluted with water.
A flat wash is one value.
A gradated wash has lights and darks.
This is a simple exercise to get you started with watercolors.
A wash is watercolor diluted with water.
A flat wash is one value.
A gradated wash has lights and darks.
Techniques
|
|
|
Practice!
Use a piece of paper to practice.
Make small sections of gradated washes as well as flat washes.
Don't scrub the paper.
Gently brush in one direction and move on.
Make small sections of gradated washes as well as flat washes.
Don't scrub the paper.
Gently brush in one direction and move on.
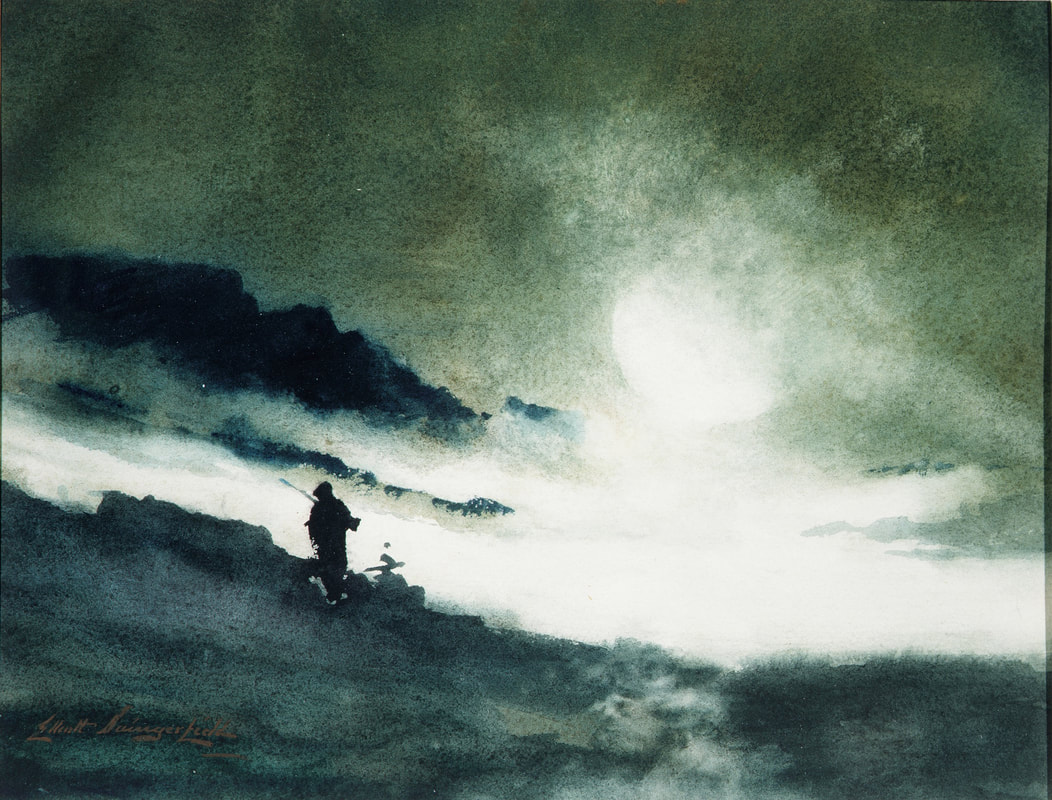
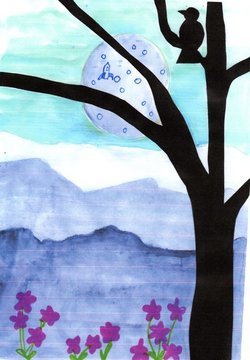
Artist: Elliott Daigerfield (American, Harpers Ferry, West Virginia 1859-1932) - watercolor on off-white wove paper - 7 7/8 x 10 1/4 in.
|
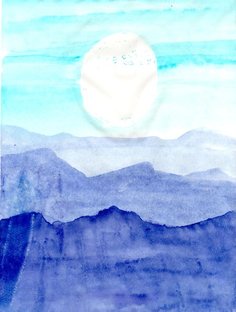
The hills are done with the same color. The lightest hills have more water to dilute the color. The darkest hills have more pigment than water.
|

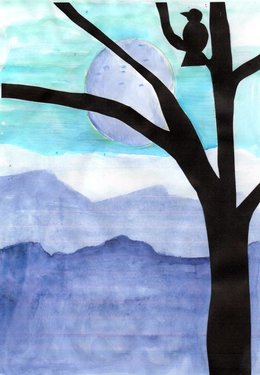
The tree and bird are a silhouette. This picture has the silhouette cut from black paper and glued to the background.
|
Make a Moonlight Landscape
Have you ever painted hills?
A moonlight scene?
Here is a project that will teach you to make light, medium, and dark values.
You will also create a foreground, middle ground, and background using values.
Mask off your moon with the rubber cement.
This will keep any paint from getting in this area.
Let it dry.
Start with the sky. Light blue?
Are there clouds in the sky?
Is the moon bright?
Now paint some hills. Medium blue? We are making the background.
Hint: Use less water!
The background creates distance in the picture.
The first layer needs to dry.
You can also use a blow dryer to speed up the drying process.
The next layer of hills need to be a bit darker so mix a darker blue.
The middle ground of the picture is in the middle.
It overlaps the background.
Go all the way to the bottom of the page. Let them dry.
One last grouping of hills. make these the darkest color yet.
So far so good. One last step to go.
You need something in the foreground of the picture. The foreground is the very front of the picture.
Maybe a tree of flowers? An animal shadow?
It is up to you!
Let your picture dry.
Clean up all your supplies and make sure the paint brush is clean.
Store the brush with the bristles up.
Sign your work.
Challenge
Color copy your painting. Draw as many details as you can on your copy! Have fun!
|
What is on the moon?
|
Color copy your work.
Take markers and color pencils to the copy.
You can add all kinds of items to your drawing. Have some fun!
This is your chance to co crazy with your drawing.
Remember to keep your original painting safe in your portfolio.
Take markers and color pencils to the copy.
You can add all kinds of items to your drawing. Have some fun!
This is your chance to co crazy with your drawing.
Remember to keep your original painting safe in your portfolio.
Journal
How did you like using the watercolors?
Did you get the watercolors to look like you wanted them to look?
What was your favorite aspect of this project?
Did you get the watercolors to look like you wanted them to look?
What was your favorite aspect of this project?
| process_of_art.doc |